
How to Do a Stocktake on Your Mobile Device
Once you've set up the RetailManager Mobile App, you're ready to start using its features.
Below, we'll show you how to complete a stocktake on your mobile device.
You can stocktake on multiple devices at the same time.
The Stocktake feature in RM Mobile makes stocktaking faster, easier, and more accurate. Using your Android phone, iPhone, tablet or iPad, you can complete stocktakes without the need for dedicated barcode scanners.
Unlike traditional stocktakes, you can complete your count over several days and even across multiple mobile devices. RM Mobile automatically accounts for any sales, purchases or stock adjustments that occur after an item has been counted, ensuring your final stocktake remains accurate.
Opening the Stocktake Window
To begin a stocktake:
- Open RM Mobile.
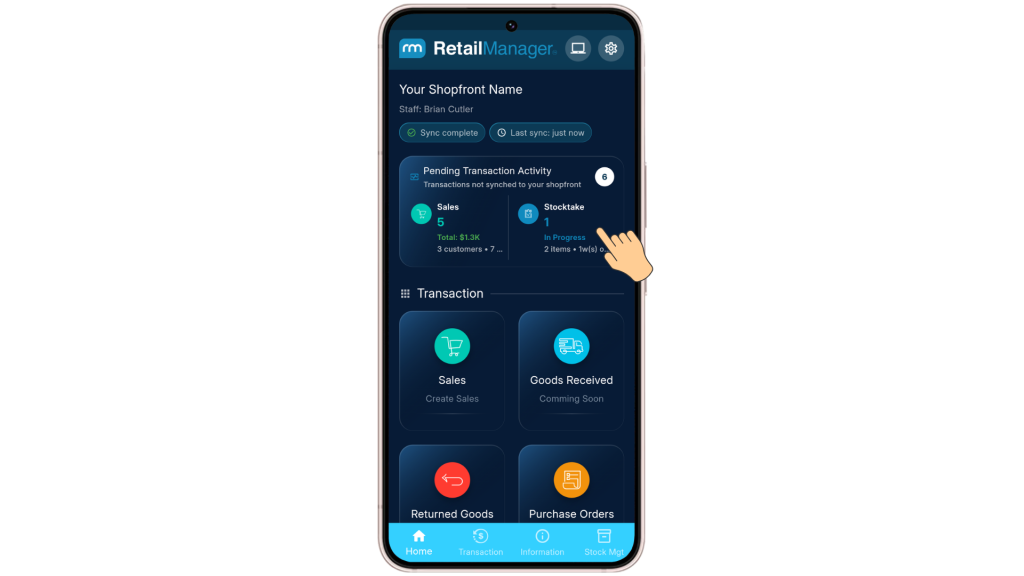
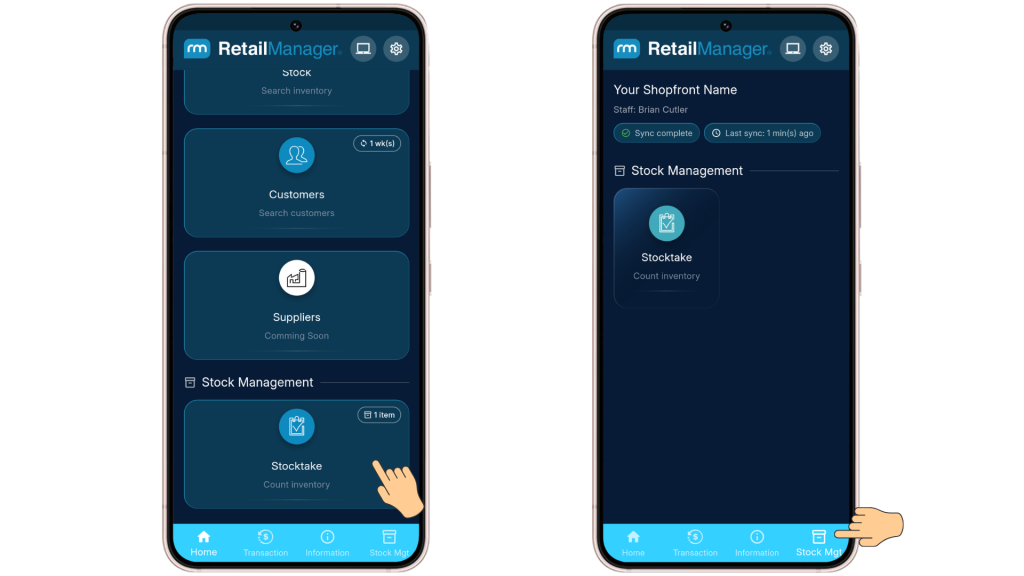
- Scroll down to Stock Management and select Stocktake.
Alternatively:
- Select Stock Mgt from the menu at the bottom of the screen.
- Select Stocktake.
Stocktake Window Overview
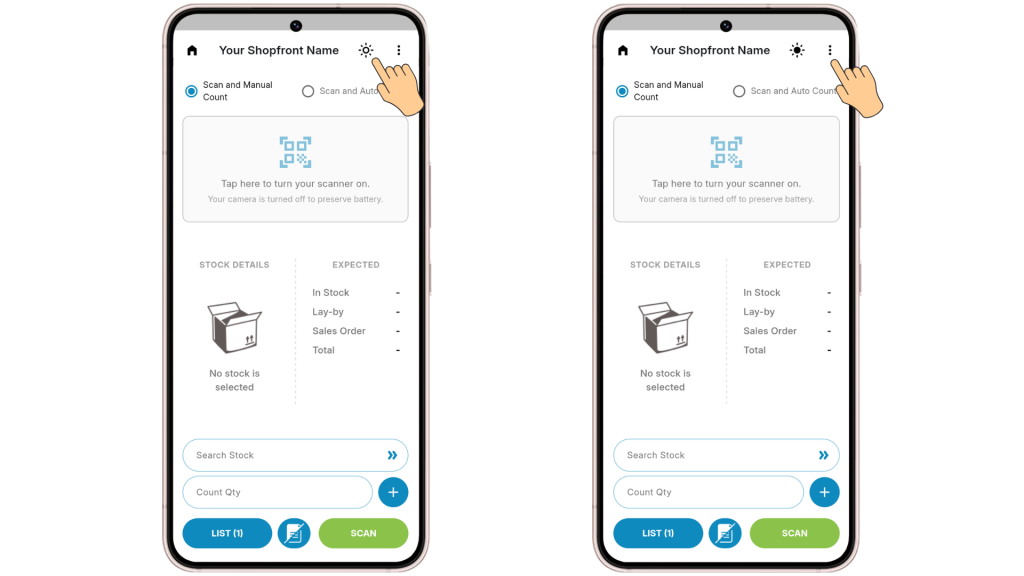
At the top of the Stocktake window you will see:
- The shopfront you are currently connected to.
- A Light On/Off option, ideal when scanning products in poorly lit areas.
- An option to Alert Repeating Counted Stock Items, which warns you if you attempt to count the same product more than once.
Choosing Your Counting Method
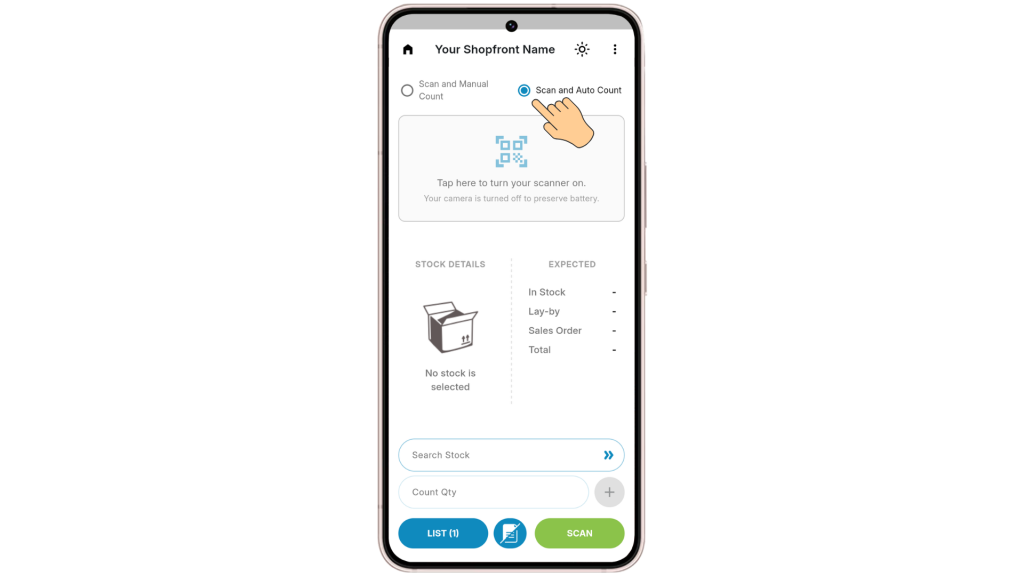
RM Mobile provides two counting methods, just like AAAPOS RetailManager.
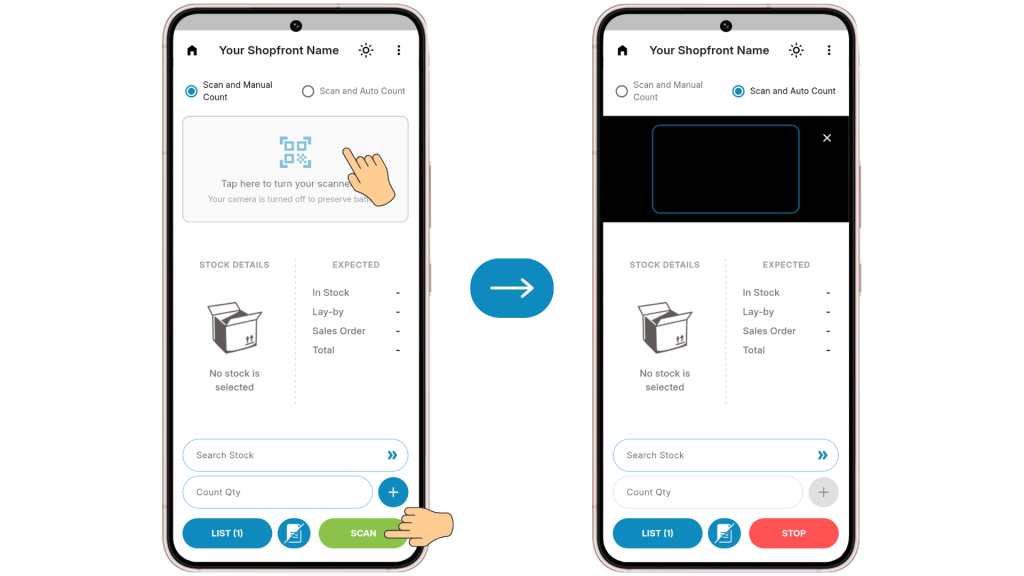
Scan and Manual Count
Scan the product barcode, count the quantity on the shelf, manually enter the quantity, then select Done/Enter on your keyboard
Scan and Auto Count
Scan each individual item. Every scan automatically increases the counted quantity by one, making this method ideal when every item is scanned individually.
Counting Products
When you are ready to begin:
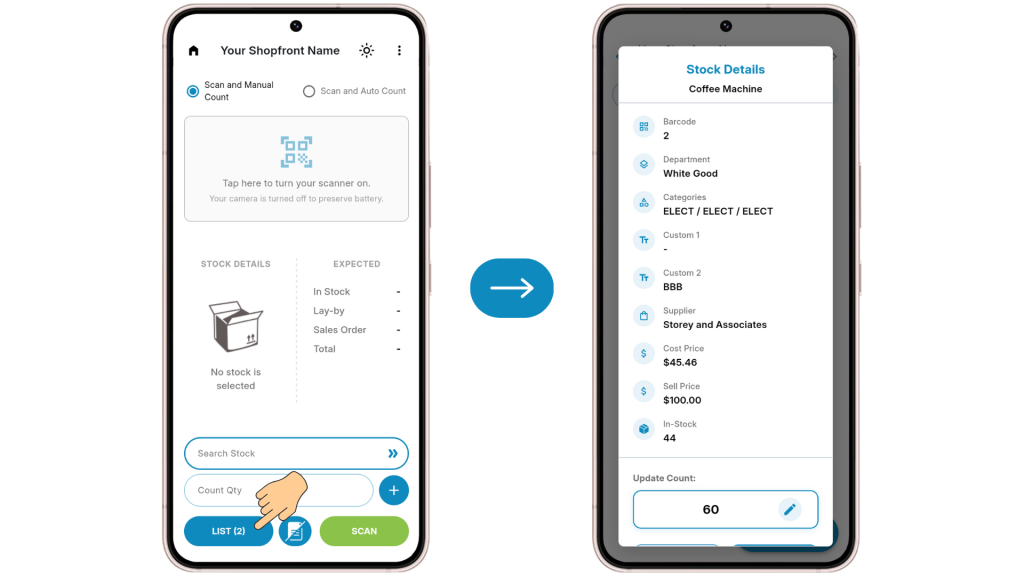
- Tap the Scanner icon or select Scan.
- Scan the product barcode.
If multiple products share the same barcode (for example, a toaster and kettle sold as separate products), a selection list will appear. Simply choose the correct product.
Once selected, RM Mobile displays:
- Product details
- Expected stock quantity
- Counted quantity
- Product image (if available)
If using Manual Count, enter the counted quantity and select Done/Enter on your Keyboard.
Repeat this process until all products have been counted.
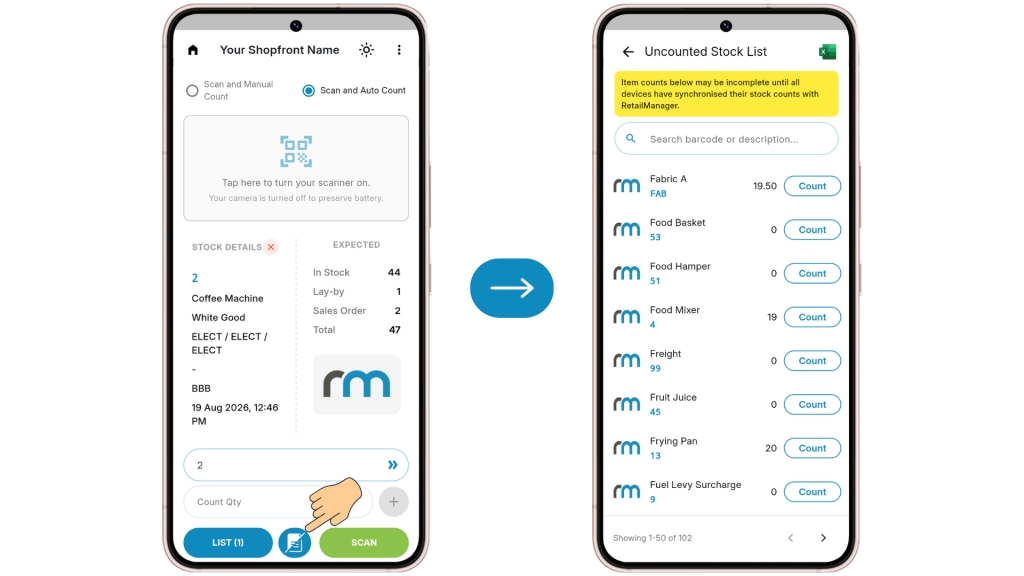
Viewing your uncounted stock
While a stocktake is in progress, you don’t need to guess which items are left to count. Next to the LIST and SCAN buttons on the stocktake screen, tap the round uncounted stock icon to open a list of every item on the shopfront that hasn’t been counted on this device yet.
A yellow banner at the top of the screen reminds you that item counts may be incomplete until all devices have synchronised their stock counts with RetailManager — so if a teammate is counting on another device, check with them before treating this list as the final word.
From here, you can:
- Search by barcode or description to jump straight to an item.
- Tap Count next to any item to return to the scanner screen with that item’s barcode already filled in and the quantity field ready for you to type into.
- Use the arrows at the bottom of the list to page through if there are more items than fit on one screen.
- Tap the Export icon in the top-right corner to save the full uncounted list to Excel — handy for handing to a manager or checking off items on paper.
If every item on the shopfront has already been counted on this device, the list will simply show “All stocks are counted on this device.”
Searching for Products
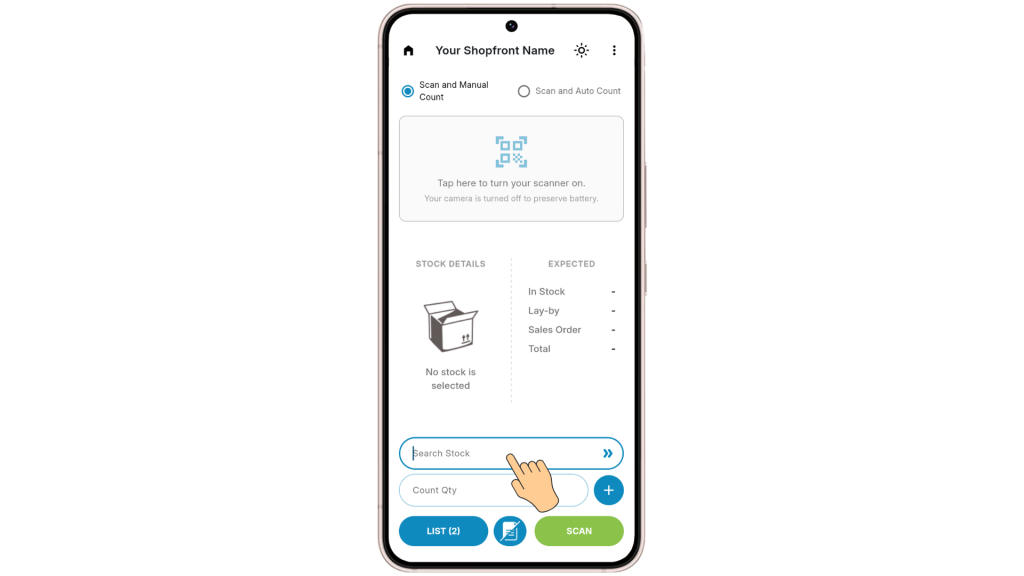
If a barcode is unavailable, you can search for a product.
- Enter part or all of the product description.
- Select Done/Enter on your Keyboard.
A list of matching products will appear.
You can also select the Browse arrows to display the complete product list. From here you can sort products by various fields, including:
- Description
- Quantity
- Other available sort options
The product list also displays a traffic light indicator showing stock status:
- 🟢 Green – In Stock
- 🟠 Orange – Out of Stock
- 🔴 Red – Negative Stock
Products That Cannot Be Counted
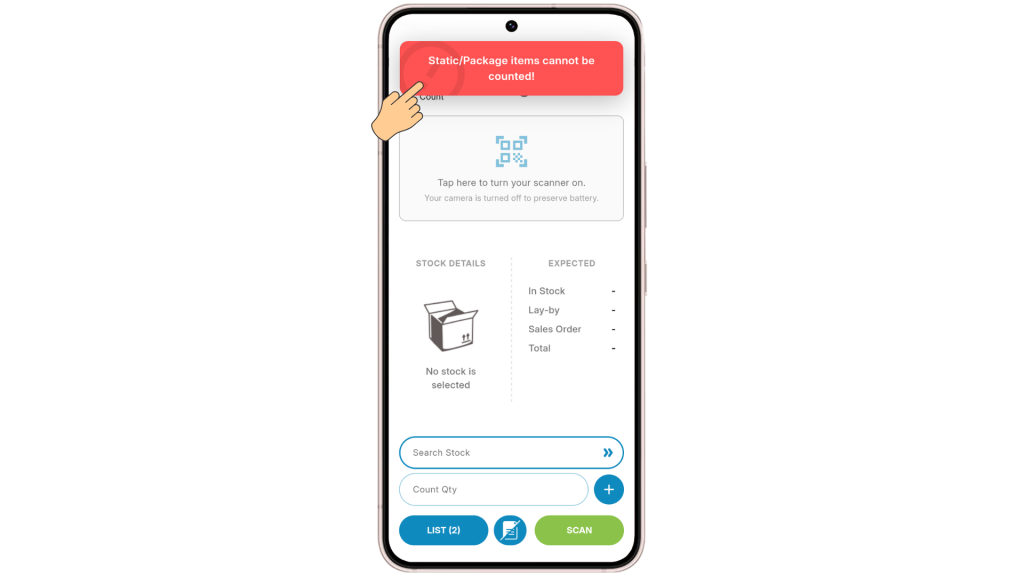
If you attempt to count a Package Product or Static Quantity Product, RM Mobile will display a message advising that these product types cannot be stocktaken.
Reviewing Counted Items
Select the List button to display every product you have counted.
From this list you can:
- Review counted items
- Edit quantities if required
- Correct products that were counted more than once
- Prepare the stocktake for sending to RetailManager
Send Stocktake to RetailManager
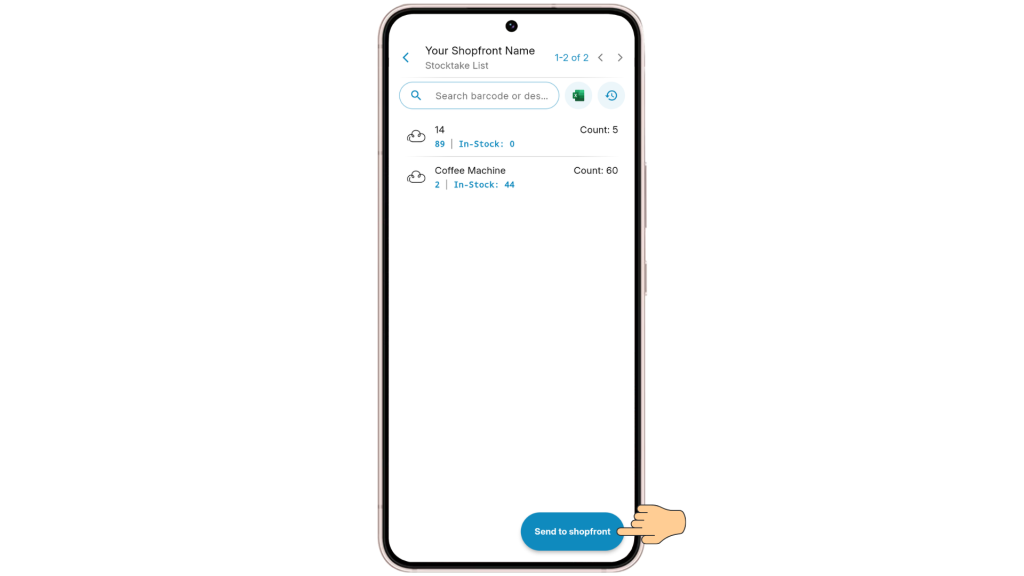
When your stocktake is complete:
- Open the counted items list.
- Select Send to Shopfront.
If any transactions have occurred after a product was counted, RM Mobile will notify you and present the following options:
- Exclude selected records
- Adjust the counted quantity and commit
- Ignore the changes and commit
After making your selection, RM Mobile sends the stocktake to your RetailManager Shopfront.
Completing the Stocktake in RetailManager
Once the stocktake has been sent, it appears in the RetailManager Stocktake window.
From RetailManager you can:
- Review discrepancies
- Print discrepancy reports
- Make any final adjustments
- Commit the stocktake
Important: Sending the stocktake from RM Mobile does not commit the stocktake. The final commit must always be completed within RetailManager.
For more information, refer to the RetailManager Video Tutorials, then select:
Stock Management → Stocktake
Continuing an In-Progress Stocktake
You can safely leave the Stocktake window at any time to process sales or perform other tasks.
When you are ready to continue, simply:
- Select Stocktake again, or
- Tap the Pending Stocktake notification.
Your previous counts will still be available, allowing you to continue exactly where you left off.