4. Settings - Shopify Setup
Part 1: Create the app in Shopify
Done entirely inside your Shopify admin. You’re creating a private custom app and setting the permissions Webstore Manager needs to read and write your store data.
1. Go to the new Dev Dashboard
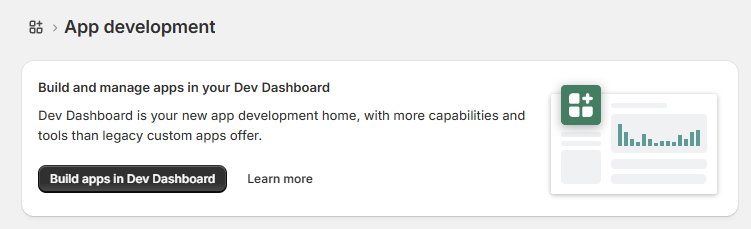
From Settings → Apps in your Shopify admin, click Develop apps, then select Build apps in Dev Dashboard.
If Build apps in Dev Dashboard does not appear, please check your account privileges, as this requires Admin / Developer rules.
2. Create a new app
In the Dev Dashboard, click Create app in the top right.
3. Name the app and create it
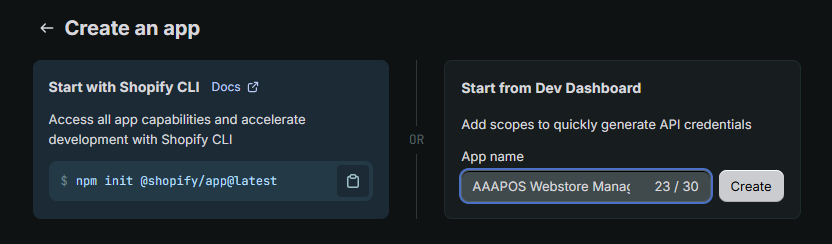
Choose Start from Dev Dashboard, give the app a name (e.g. AAAPOS Webstore Manager), then press Create.
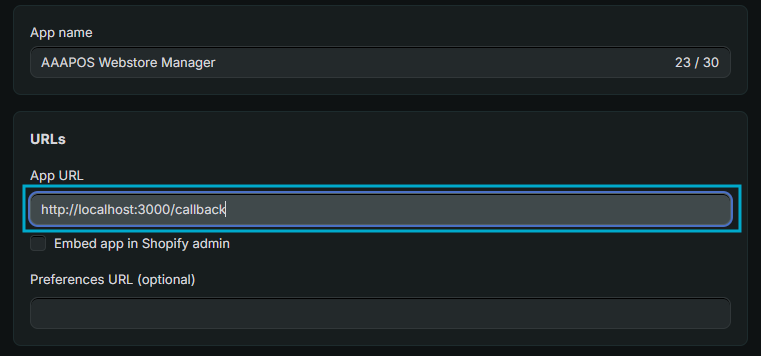
4. Make sure "Embedded app" is unticked
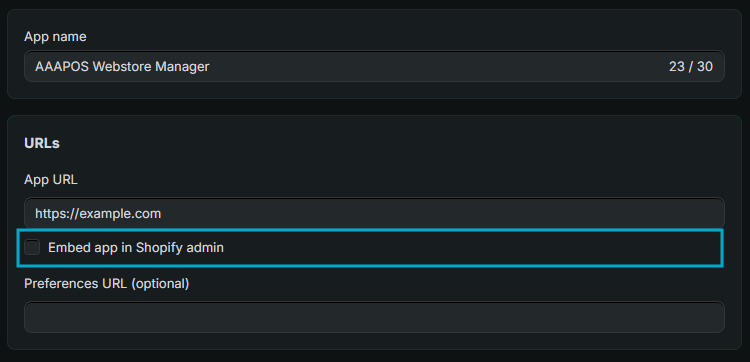
On the app’s version page, find the Embedded app in Shopify admin toggle under URLs and switch it off. WM connects as an external app, not an embedded one.
Leaving this ticked is the most common reason the connection fails later — double-check it’s off.
5. Copy the App URL from Webstore Manager into Shopify
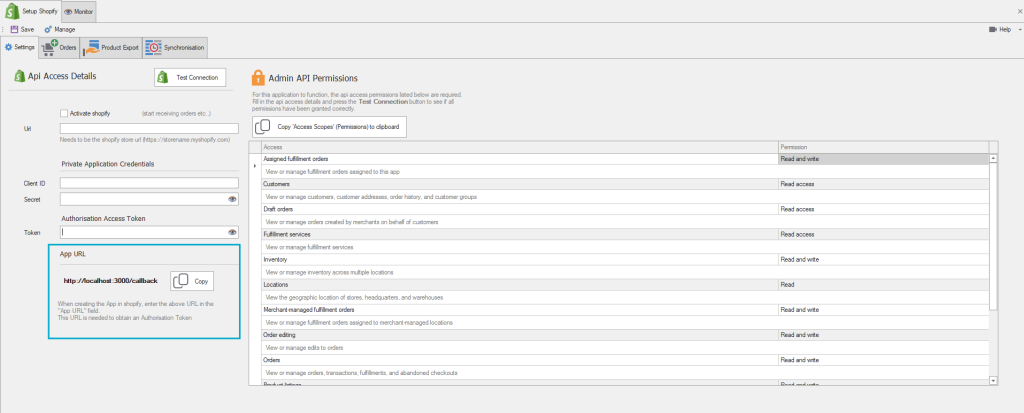
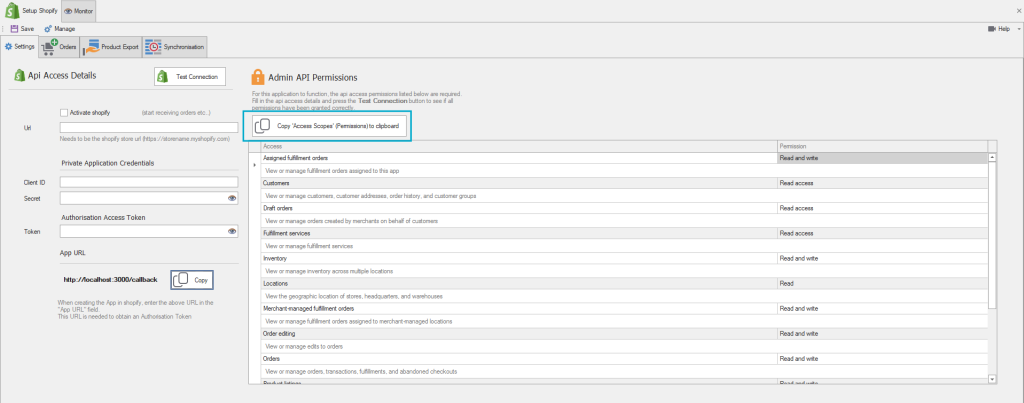
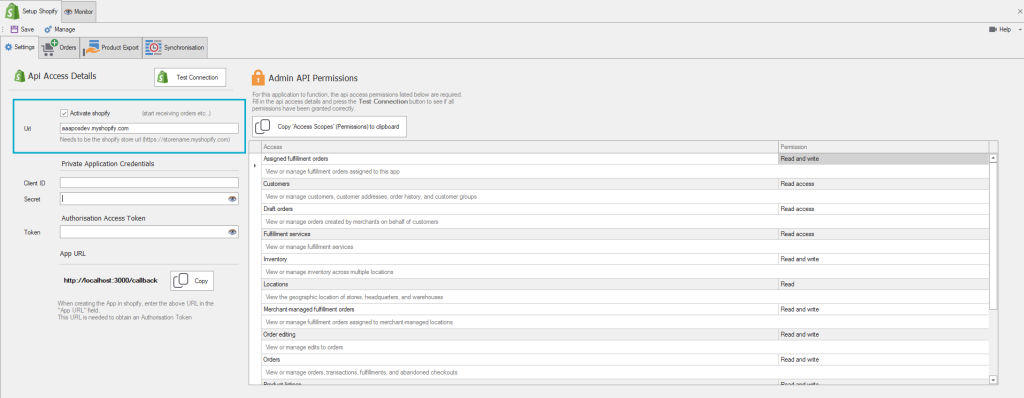
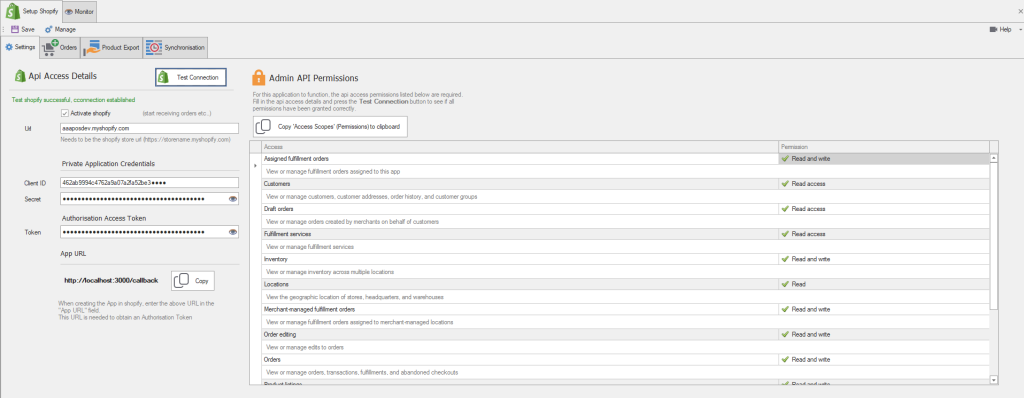
In Webstore Manager, go to Setup Shopify → Settings and copy the App URL shown there (it’ll look like http://localhost:3000/callback).
Paste it into the App URL field in Shopify.
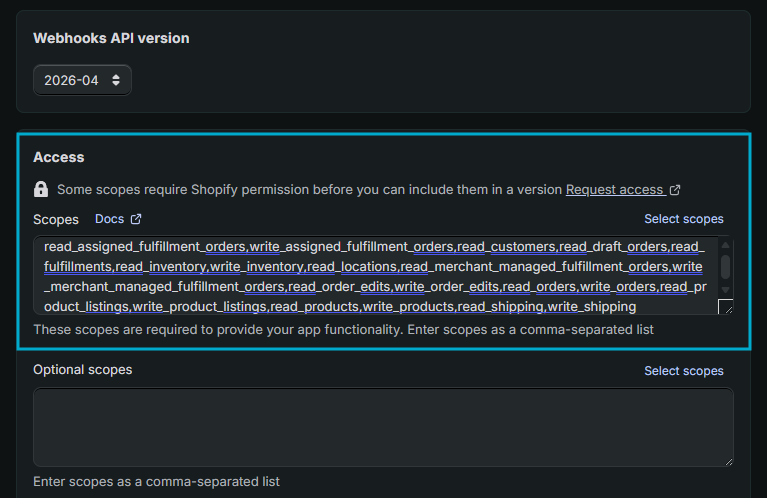
6. Copy the Scopes from WM into Shopify
Back in Webstore Manager’s Admin API Permissions panel, click Copy Access Scopes to clipboard.
In Shopify, paste them into the Scopes field under Access.
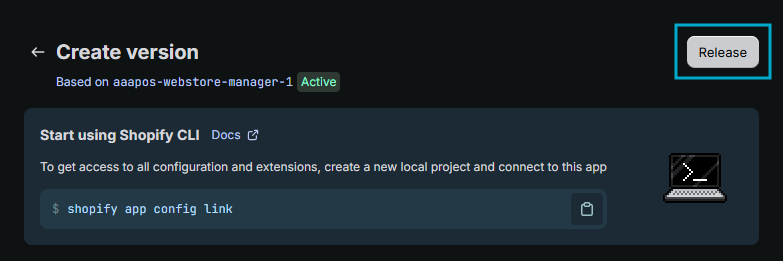
7. Press Release
With the App URL and Scopes filled in, click Release in the top right of the app version page, then confirm in the dialog that appears.
Part 2: Connect the app in WM
Now switch over to Webstore Manager to finish pairing it with the app you just released in Shopify.
8. Activate Shopify Integration
In Webstore Manager’s API Access Details panel, select Activate Shopify to enable the connection between Webstore Manager and Shopify, then enter your Shopify URL.
Please note that you must use the storename.myshopify.com domain, not a custom domain that points to the myshopify.com domain.
9. Go to the Settings menu in Shopify
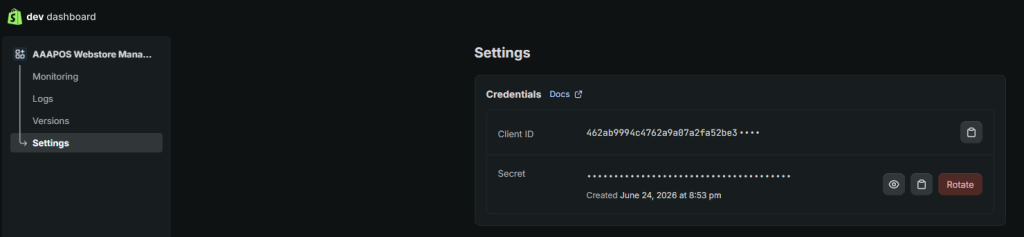
In the Dev Dashboard, open the Settings tab on the left-hand side to view your credentials.
10. Copy Client ID and Secret to Webstore Manager
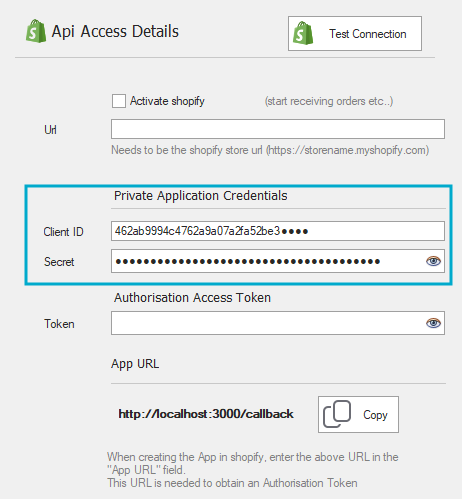
Copy the Client ID and Secret shown under Credentials, and paste each into the matching field in Webstore Manager’s Admin API Permissions panel.
11. Get the authorisation token
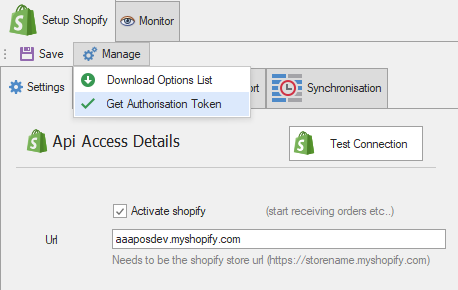
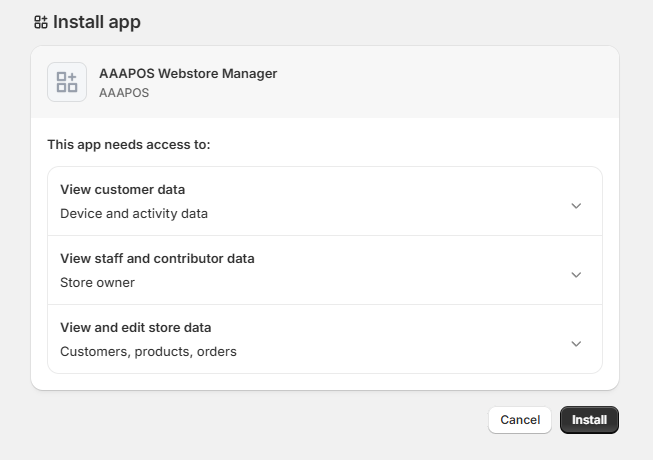
In Webstore Manager’s Manage menu, select Get Authorisation Token. A Shopify login window opens — when prompted, install the app.
You may be asked to enter your Shopify username and password before the install screen appears.
12. Token fills in automatically
Once you install the app, Webstore Manager receives the authorisation token and fills it into the Token field for you — no need to copy this one manually.
13. Press Test Connection
Click Test Connection. A success message confirms Webstore Manager can read and write to your store, and the full list of granted permissions appears below.